Cleaning camera lens fungus requires specific tools and careful handling. First, examine the lens under bright light to identify fungus patterns, then gather isopropyl alcohol, microfiber cloths, and cotton swabs. Work in a dust-free environment while wearing nitrile gloves to prevent contamination. Gently disassemble the lens if possible, apply cleaning solution with circular motions, and allow to dry completely. For prevention, store equipment in environments below 60% humidity with silica gel packets. Proper technique preserves optical clarity and equipment value.
Key Takeaways
- Prepare a dust-free workspace with proper lighting, nitrile gloves, and microfiber cloths to prevent contamination during cleaning.
- Carefully disassemble the lens using rubber vacuum pads, maintaining element order for proper reassembly later.
- Create a specialized cleaning solution using isopropyl alcohol, as standard lens cleaners are ineffective against fungal growth.
- Gently clean each lens element using circular motions with a soft cloth after soaking in the solution.
- Prevent future fungus by storing lenses below 60% humidity with silica gel packets and occasional UV exposure.
What Is Lens Fungus and Why It’s Dangerous
When photographers discover cloudy spots or web-like patterns within their lenses, they are likely encountering lens fungus, a common but serious problem affecting optical equipment. These organisms, typically from water mold and sac fungi groups, don’t consume glass but thrive on adhesives, fibers, and organic residues like fingerprints. Fungus Causes include prolonged exposure to humidity above 70%, limited airflow, darkness, and temperatures between 10°C and 35°C. The presence of cleaning kits can help prevent and address minor infestations before they cause irreversible damage. The Danger Effects cannot be overstated as lens fungus permanently damages optical surfaces through etching and clouding. Metabolic acids produced by the fungi contribute to this irreversible damage, greatly reducing equipment value regardless of brand. The progression ranges from barely noticeable spots to complete optical failure, rendering lenses unusable. Cleaning attempts often risk further damage, making prevention far more effective than remediation.
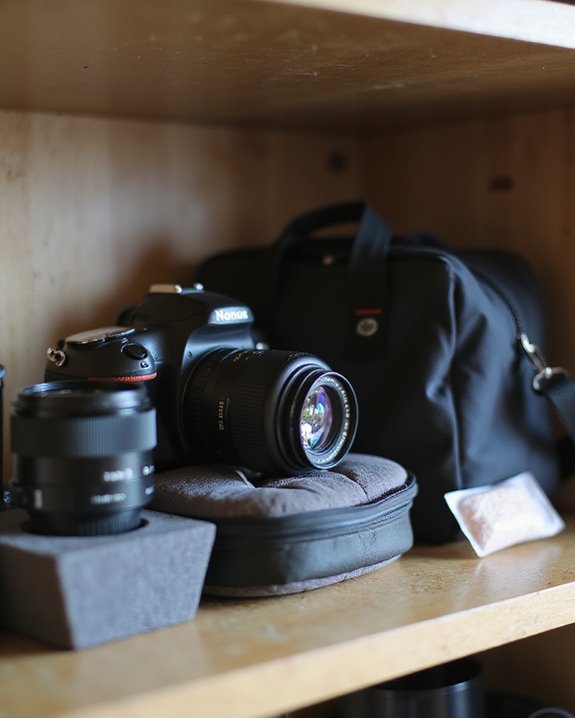
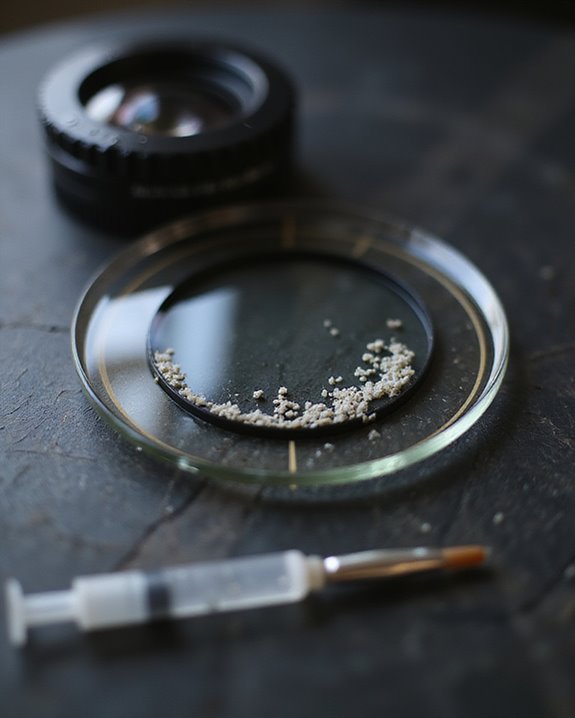
Tools and Materials Needed for Lens Cleaning
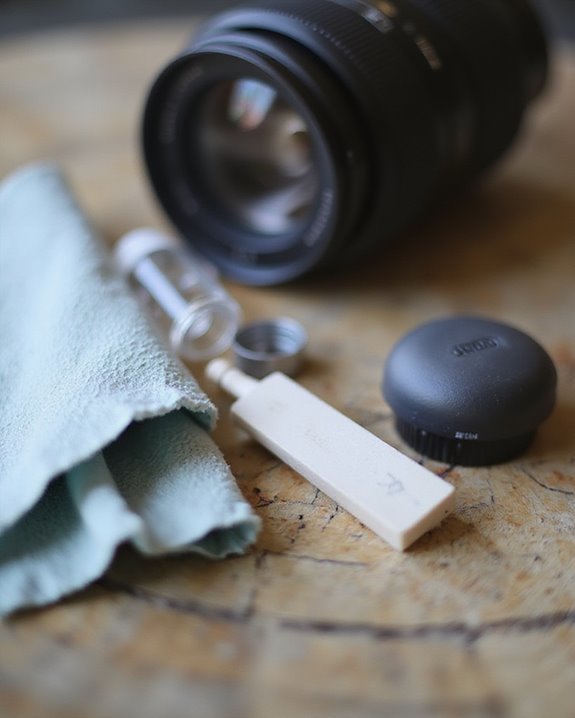
The proper cleaning of lens fungus requires a carefully assembled toolkit of specialized solutions, tools, and equipment to guarantee effective removal without causing additional damage. Photographers can utilize Budget Tools like microfiber cloths, cotton swabs, and isopropyl alcohol for basic fungus treatment, while shallow dishes and timers help manage the soaking process effectively. Innovative Materials include the ammonia, hydrogen peroxide, and vinegar solution that dissolves fungus efficiently, though specialized lens fluids offer pre-mixed alternatives for those seeking convenience. Essential equipment encompasses protective nitrile gloves, lint-free workspace materials, and proper illumination for detailed inspection. While professional services remain recommended for complex lenses, many photographers successfully clean simpler optics by carefully combining these accessible materials with proper technique, ventilation, and patience. Quality microfiber cloths from top cleaning kits help prevent scratches and ensure streak-free results during the process.
Safety Precautions Before You Start
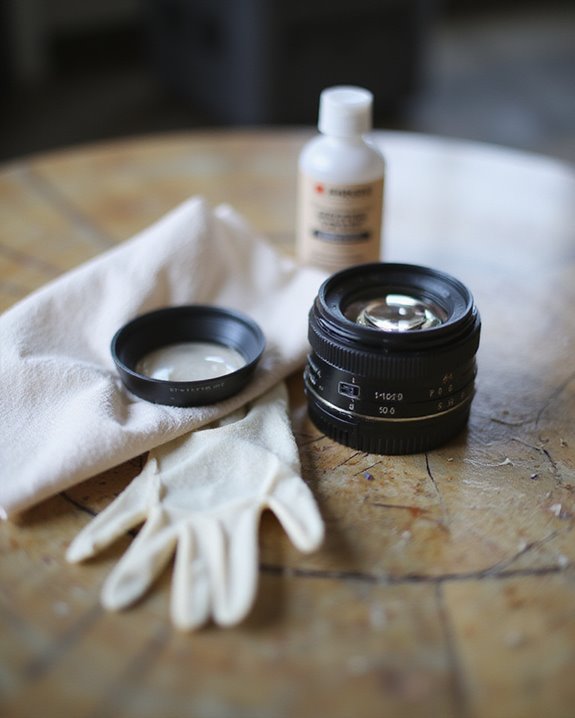
Before attempting to clean lens fungus, photographers must implement thorough safety measures to protect both themselves and their valuable optical equipment. Proper Glove Safety requires using nitrile gloves exclusively, as they prevent finger oils from contaminating lens elements during the delicate handling process. Mask Hygiene demands the use of cleanroom-quality face coverings to prevent respiratory moisture from settling on optical surfaces.
The workspace should be prepared with specific environmental controls: maintain a dust-free area away from windows and vents, position silica gel packets nearby to reduce humidity, and avoid direct sunlight exposure on glass elements. Temperature should remain between 18-23°C to prevent condensation formation. Additionally, photographers should employ anti-static wrist straps when handling electronic components in modern lenses and establish separate zones for clean and contaminated parts to prevent cross-contamination. Using specialized lens cleaning products can help ensure safe and effective removal of fungus without damaging lens coatings.
Step-by-Step Fungus Removal Process
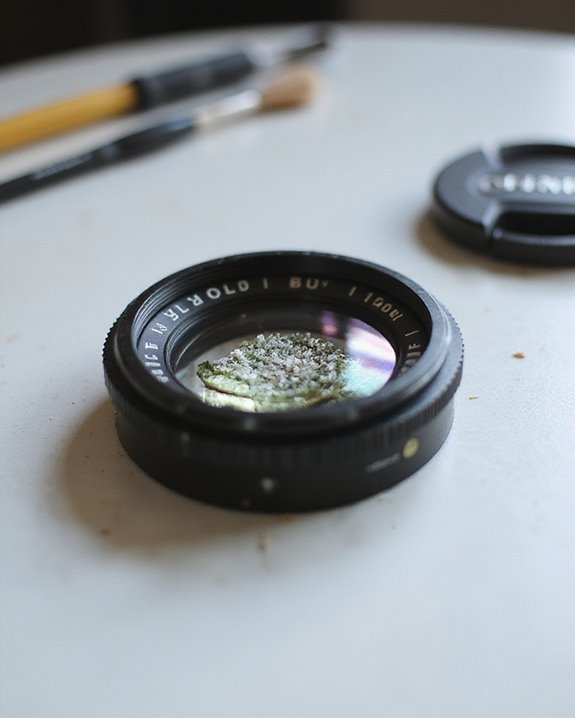
With proper safety measures established, photographers can now proceed to the actual fungus removal operation, which requires specific tools, solutions, and techniques for success. The process begins with Fungus Detection, examining each lens element carefully under good lighting to identify affected areas. Next, disassemble the lens using rubber vacuum pads or appropriate tools, removing securing rings methodically while maintaining Element Arrangement in the exact order of removal.
Once disassembled, prepare a specialized fungus-removing solution, as standard lens cleaners or alcohol prove ineffective. Soak affected elements for several minutes until bubbles form, indicating the solution is working. Gently wipe away dissolved fungus using circular motions with a soft cloth, never applying significant pressure. After thorough cleaning, place elements on clean towels, use a blower to remove moisture, and finish with a microfiber cloth for maximum clarity.
Handling Difficult Cases and Glued Elements
Particularly challenging cases of lens fungus removal arise when dealing with cemented or glued elements, requiring photographers to adjust their cleaning approach accordingly. Case Analysis becomes critical when determining whether disassembly is necessary, as glued components demand specialized techniques to prevent separation during cleaning.
Glue Handling requires exceptional care, with gentle methods preferred over traditional soaking. Photographers may employ diluted alcohol to soften adhesives without causing separation, while the swinging technique allows cleaning solution to reach fungus at element edges without oversaturating the glue. Solvents must be selected cautiously, as improper chemicals can permanently damage lens coatings or adhesive junctions. For valuable equipment or when uncertain about the lens construction, consulting professional technicians represents the safest approach, especially when fungus appears deeply embedded between glued elements.
Preventing Future Fungal Growth

Successful treatment of fungus-infected lenses should be followed by a thoughtful prevention strategy, as photographers who successfully eliminate lens fungus often face recurring growth without proper protective measures. Environmental control serves as the primary defense against fungal recurrence, with Dehumidifier Use being essential for maintaining ideal humidity levels below 60%. Photographers should store equipment in sealed cases containing silica gel packets that absorb excess moisture and can be reactivated when saturated.
UV Exposure provides additional protection, as fungal spores cannot survive prolonged contact with ultraviolet light. Dry cabinets represent an ideal storage solution, offering controlled environments with customizable humidity settings. For those without specialized equipment, maintaining constant temperatures, avoiding sudden environmental changes, and ensuring proper ventilation can greatly reduce the risk of fungal development in valuable optical equipment.
Frequently Asked Questions
Can Lens Fungus Spread to Other Camera Equipment?
Lens fungus can spread to other camera equipment when stored together in humid, dark conditions. Proper equipment protection through separate storage, humidity control, and avoiding physical contact minimizes fungus transmission between lenses and bodies.
How Long Does Professional Lens Fungus Cleaning Typically Take?
Professional lens fungus cleaning duration varies greatly based on severity and complexity. Time factors include assessment, disassembly requirements, and treatment methods. Simple cases may take hours, while complex situations can require several days to complete.
Will Insurance Cover Lens Damage From Fungal Growth?
Nearly 85% of insurance policies exclude gradual damage like fungus. Standard policies rarely cover lens fungal growth unless explicitly added. Claim processes typically require proof of sudden occurrence rather than neglect or poor storage.
Can Fungus-Damaged Lenses Ever Regain Their Original Optical Quality?
Once fungus has etched glass surfaces, original optical quality is generally unrecoverable. Quality testing after cleaning typically reveals permanent degradation in contrast and resolution, even when visible fungus has been removed. Fungus impact is irreversible.
How Do Vintage Lenses Differ in Fungus Treatment Approaches?
Vintage lenses require more invasive dismantling due to their construction. Historical treatments must account for older glass types, which often feature less resistant coatings and may require specialized chemical solutions versus modern counterparts.