
To remove an iPhone camera lens, we’ll need a heat source (hair dryer on low or iOpener pack), plastic opening picks, and 91% isopropyl alcohol. First, power off the device completely, place it face-down on a clean microfiber cloth, and apply controlled heat for 60-90 seconds from a 6-inch distance. Once the adhesive softens, insert a 0.1mm plastic shim at a 30-degree angle, working methodically around the perimeter. The following steps will help you avoid damaging your device’s delicate components.
Key Takeaways
- Power off iPhone completely and place it face-down on a clean microfiber cloth before attempting lens removal.
- Apply controlled heat with a hair dryer at medium setting for 60-90 seconds to soften the adhesive holding the lens.
- Insert a thin 0.1mm plastic shim or opening pick beneath the lens at a 30-degree angle once adhesive is pliable.
- Work methodically around the lens perimeter, alternating between heat application and gentle prying with plastic tools.
- Use isopropyl alcohol (91%) with microfiber cloths to remove any residual adhesive after lens removal.
Essential Tools for Iphone Camera Lens Removal
The proper removal of an iPhone camera lens requires a thorough set of specialized tools to guarantee the process proceeds without damaging your device’s delicate components. We’ve identified several heat application methods as essential, including low-setting hair dryers and iOpener packs, which deliver controlled temperatures to soften adhesive bonds. Tool maintenance is critical—keep plastic opening picks and specialized lens wrenches clean to prevent debris transfer during delicate operations.
For those seeking alternative tools, dual-ended removal implements offer versatility when standard options aren’t available. We recommend anti-static gloves and a lint-free work environment to prevent contamination. Isopropyl alcohol (91%) applied with microfiber cloths effectively dissolves residual adhesive. Complete repair kits containing suction cups and adjustable jaw openers greatly improve success rates compared to improvised solutions.
Step-by-Step Camera Lens Removal Process
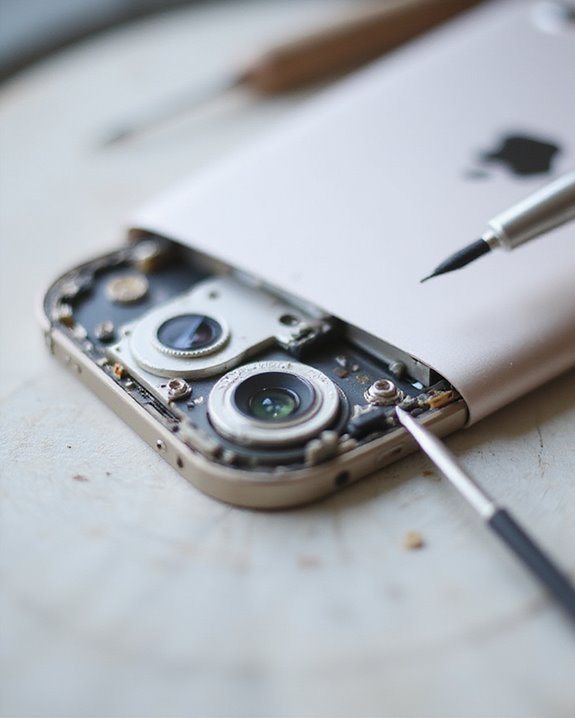
Removing your iPhone’s camera lens requires methodical precision and careful attention to safety protocols. Begin by powering off your device completely and placing it face-down on a clean microfiber cloth. Before proceeding, make sure your hands are thoroughly washed to eliminate oils that could damage optical components.
Apply controlled heat using a hair dryer at medium setting for 60-90 seconds, maintaining a 6-inch distance, or use an iOpener as an alternative method for more precise temperature regulation. Test adhesive pliability every 15 seconds. Once softened, identify a lifting point and carefully insert a 0.1mm plastic shim beneath the protector at a 30-degree angle. Work methodically around the perimeter, alternating between heat application and gentle prying. Safety tips include avoiding metal tools entirely, monitoring component temperature continuously, and ceasing immediately if resistance feels excessive.
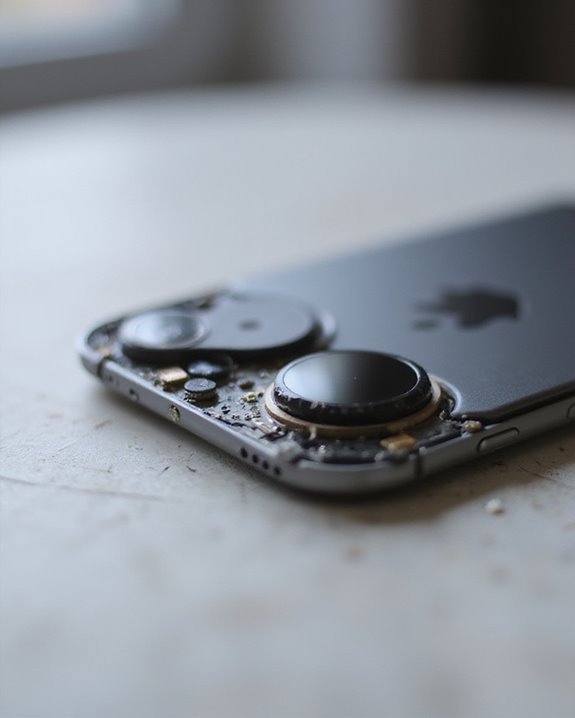
Dealing With Stubborn Adhesive and Lens Housing
While encountering stubborn adhesive during iPhone camera lens removal can present significant challenges, we’ve developed several effective techniques to address this common issue. Applying low, controlled heat with a hair dryer or heat gun remains our primary approach for softening resilient adhesives. For particularly tenacious bonds, we recommend specialized Adhesive Alternatives such as electronics removal kits that provide safer dissolution methods than conventional solvents.
When working with lens Housing Innovations on newer iPhone models, we advise using plastic or rubber spudgers rather than metal tools to prevent scratching. Apply heat evenly across the housing surface, maintaining temperatures below 80°C to avoid component damage. For best results, alternate between gentle heating cycles and careful prying, allowing adequate cooling periods between attempts to prevent thermal stress to surrounding sensors.
Reinstalling the New Camera Lens Properly

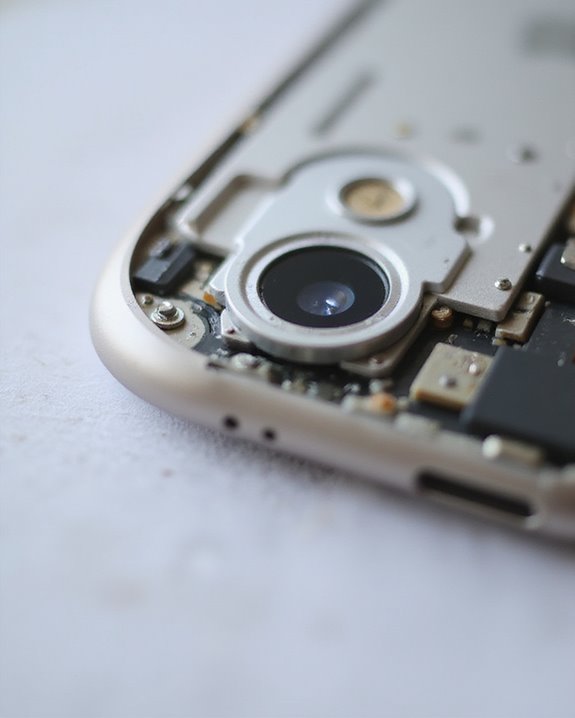
Successfully removing the damaged iPhone camera lens is only half the battle—reinstalling the new lens correctly guarantees best camera performance and longevity. Before placement, thorough lens cleaning with appropriate solvents is essential, as microscopic debris can affect image quality. Surface preparation includes removing all residual adhesive with specialized adhesive remover, ensuring ideal bonding conditions.
When handling the replacement lens, we recommend using precision tweezers to avoid fingerprint contamination. Select the appropriate lens size from your kit, aligning it precisely with the housing. Apply adhesive sparingly around the perimeter, avoiding excess that might seep onto optical surfaces. Once placed, examine under magnification for air bubbles or misalignment issues. After installation, reassemble any removed components and conduct a thorough camera test, checking focus, clarity, and overall functionality before finalizing the repair.
Troubleshooting Common Issues After Lens Replacement
Despite careful installation, iPhone camera lens replacements can sometimes lead to unexpected issues that affect performance. Common problems include misaligned lenses causing blurry images, improperly sealed gaskets leading to moisture penetration, and adhesive failures resulting in lens displacement over time.
When diagnosing post-replacement issues, check for signs of water damage or corrosion, which indicate inadequate Moisture Prevention. Use tweezers to realign lenses if images appear distorted, and verify all gaskets are properly sealed. For Electrical Glitches, inspect cable connections thoroughly, as damaged connectors often cause camera malfunctions or failure to initialize. Always test camera functionality thoroughly after any adjustments. If image quality remains poor, consider whether non-OEM lenses may be the culprit, as these frequently provide inferior results compared to original components. Proper troubleshooting requires patience, precision, and attention to detail.
Additionally, understanding the OEM components used in repair kits can help ensure that replacements match the original specifications, reducing the likelihood of issues post-installation.
Frequently Asked Questions
Will Removing the Camera Lens Void My Iphone Warranty?
We’re afraid your device’s protection might experience some challenges. Yes, removing the camera lens yourself carries significant warranty implications, with voiding risks almost certain due to tampering evidence and broken seals Apple technicians readily identify.
Can I Replace Just the Glass Without Changing the Entire Camera?
Yes, we can replace just the glass, but it’s highly complex. The glass adhesives make it risky for DIYers. We’d recommend a professional service to avoid damaging your camera module or internal components.
How Do I Prevent Dust From Getting Inside During Lens Replacement?
Time is dust’s best friend when replacing lenses. We recommend working in a clean workspace, turning off the device, and using dust prevention techniques like lens covers. We’ll also want to avoid shaking or tapping.
Does Lens Replacement Affect Face ID or Other Iphone Sensors?
We’d caution that lens replacement can affect Face ID if you disturb the TrueDepth system. Sensor calibration is critical, and biometric risks arise if the infrared camera or dot projector become unpaired from your device.
What Are Signs That Indicate My Camera Lens Needs Replacement?
Like a foggy window to the world, your lens needs replacement when we see these damage indicators: blurry photos, dark spots, light leaks, focusing issues, and visible cracks. These lens symptoms shouldn’t be ignored.


