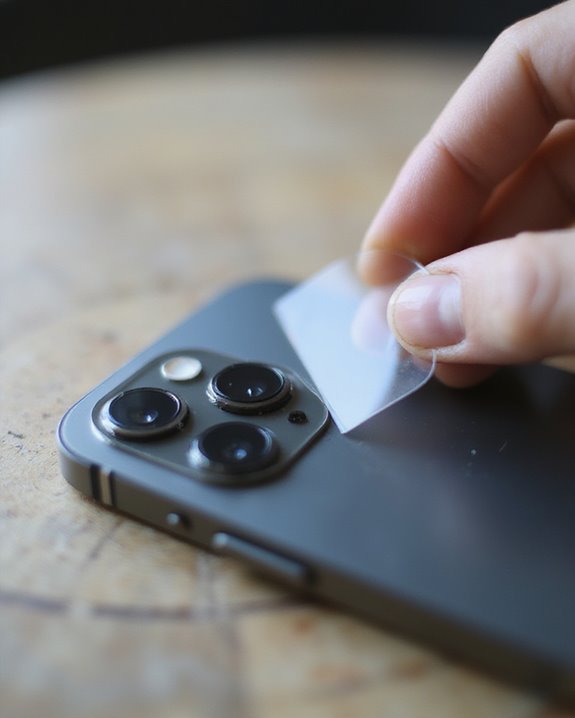
To remove a camera lens protector, power off the device completely and place it on a clean surface. Insert a non-metallic tool like a plastic card or guitar pick at one corner, applying gentle pressure to lift the edge. Slowly peel the protector away using consistent force around the perimeter. For stubborn adhesive, apply low heat from a hairdryer in 5-10 second intervals. After removal, clean the lens with isopropyl alcohol on a microfiber cloth using circular motions. The following detailed process guarantees damage-free removal for all device types.
Key Takeaways
- Insert a non-metallic pry tool at one corner of the lens protector and apply gentle pressure to lift it.
- Apply heat with a hairdryer on low setting for 5-10 seconds to soften adhesive before attempting removal.
- Slowly peel the protector away using even, consistent force along the edges rather than pulling from one point.
- Clean any residual adhesive using 90% isopropyl alcohol applied to a microfiber cloth in circular motions.
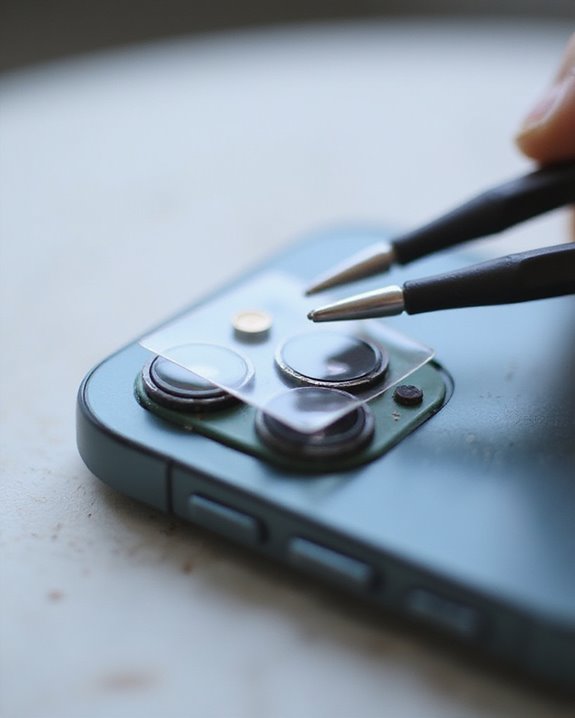
- For broken protectors, direct fragments inward to avoid scratching the camera lens surface during removal.
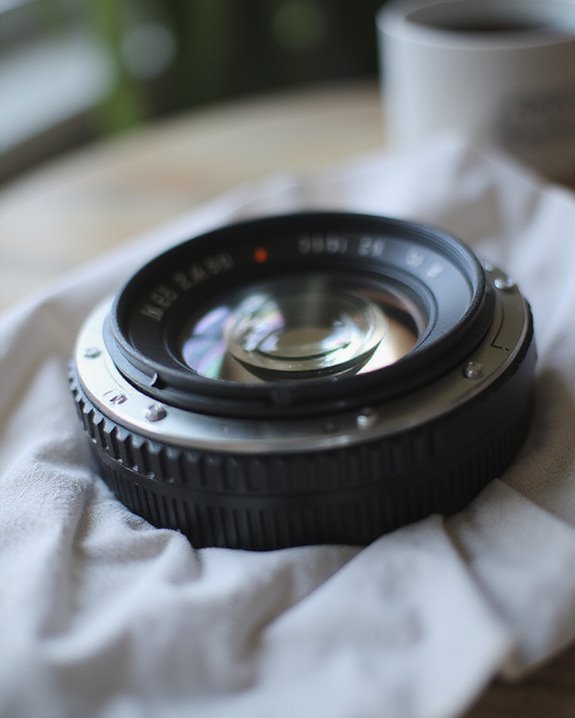
Understanding Camera Lens Protectors
Camera lens protectors serve as essential safeguards for photography equipment, providing a barrier between delicate lenses and potential damage. These protective accessories come in various forms, including UV filters, lens hoods, and lens caps, each designed to shield against specific environmental threats such as dust, moisture, scratches, and harmful UV rays. Typically crafted from glass or other durable materials, quality protectors maintain image clarity while extending lens longevity. Most protectors feature high light transmittance to ensure that image quality is preserved without compromising performance.
The Cost Efficiency of lens protectors is significant when compared to expensive lens repairs or replacements, making them a wise investment for photographers at any level. Additionally, maintaining scratch-free lenses through proper protection helps preserve a camera’s Resale Value over time. Though simple in concept, these protective elements play a vital role in maintaining consistent image quality and protecting valuable photography equipment.
Essential Tools for Safe Removal
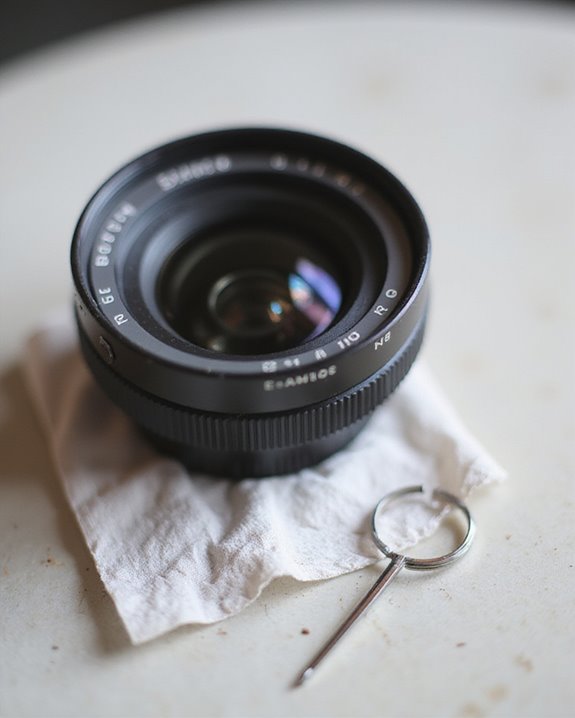
Removing a camera lens protector safely requires specific tools designed to minimize the risk of damage to the delicate lens beneath. Heat application tools, such as hairdryers on low settings, effectively soften the adhesive for easier removal, while plastic pry tools or guitar picks serve as gentle alternatives for lifting the protector’s edges without scratching. A clean, static-free workspace prevents debris transfer during the process.
Tool alternatives include common household items like toothpicks or plastic cards when specialized equipment isn’t available. Maintenance tips involve keeping microfiber cloths handy for cleaning before and after removal, as dust particles can cause scratches during the process. Electronic removal kits, which typically include precision instruments like tweezers and non-metallic prying tools, offer thorough solutions for those who frequently work with camera equipment.
Preparing Your Device Before Starting
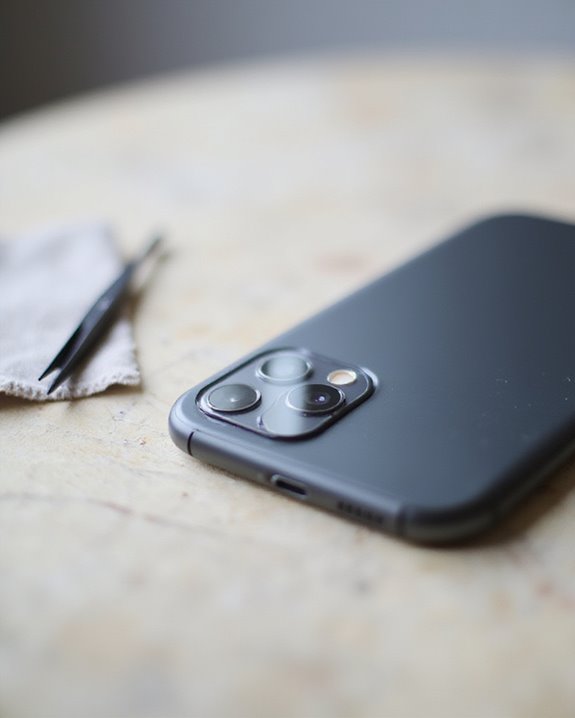
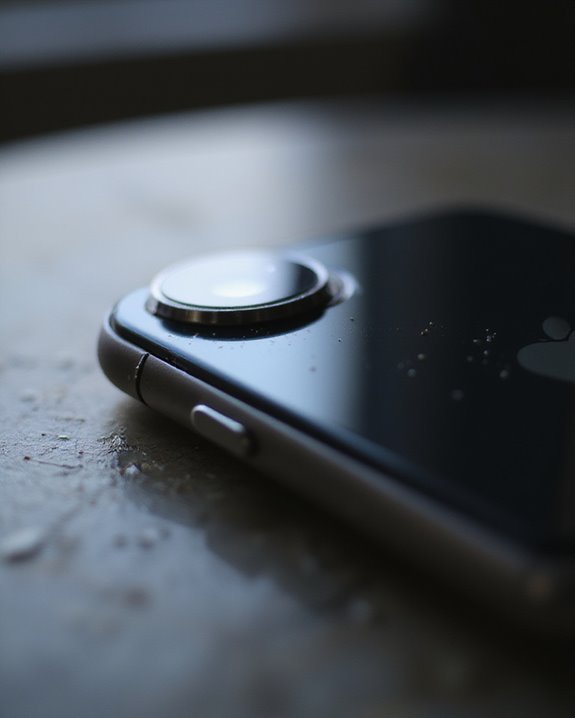
Before attempting to remove a camera lens protector, proper device preparation is essential to prevent potential damage and guarantee a smooth process. Users should first power off the device completely to avoid accidental inputs that could interfere with the removal procedure. Hand cleaning is a critical preliminary step, as oils and dirt from fingers may transfer to the lens surface, potentially compromising image quality once the protector is removed. Additionally, understanding the impact resistance of the protector can guide the removal approach, ensuring minimal risk of damage. Device positioning plays a significant role in successful protector removal, with experts recommending placing the device face-down on a clean, flat surface to maintain accessibility to the lens area. This orientation provides stability while working and prevents potential scratches to the screen. Additionally, users should make sure adequate lighting conditions to clearly identify the edges of the protector before proceeding with removal techniques.
Step-by-Step Removal Technique
Successfully removing a camera lens protector requires careful technique and proper tools to avoid damaging the delicate lens components beneath. The Technique History demonstrates that plastic pry tools have replaced metal implements, which often caused scratches and permanent damage to expensive lenses.
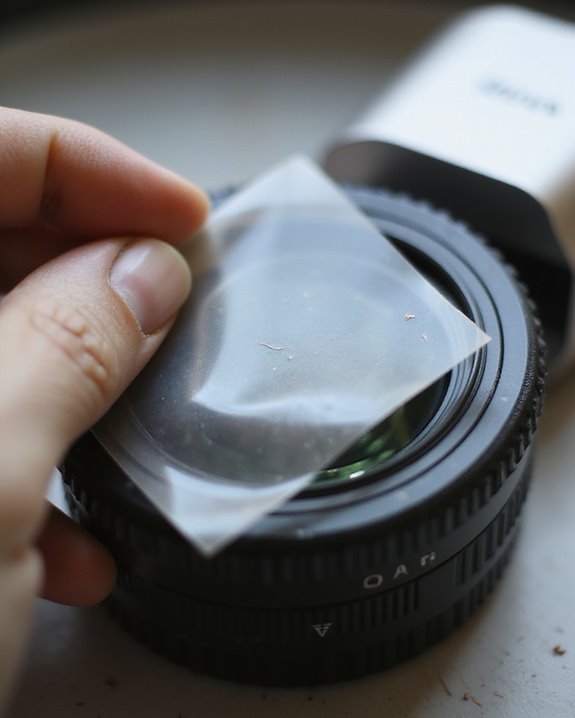
Begin by inserting a non-metallic pry tool at one corner of the protector, applying minimal pressure. Once lifted, slowly peel the protector away using even, consistent force while following the edges carefully. Clean the lens afterward with a microfiber cloth dampened with lens solution or isopropyl alcohol, using gentle circular motions to remove any adhesive residue. Allow the lens to air dry completely before use or reapplication of a new protector.
Future Trends indicate advanced nano-adhesives that will make protector removal easier while providing superior protection against scratches and impacts.
Heat Application Methods for Adhesive Loosening
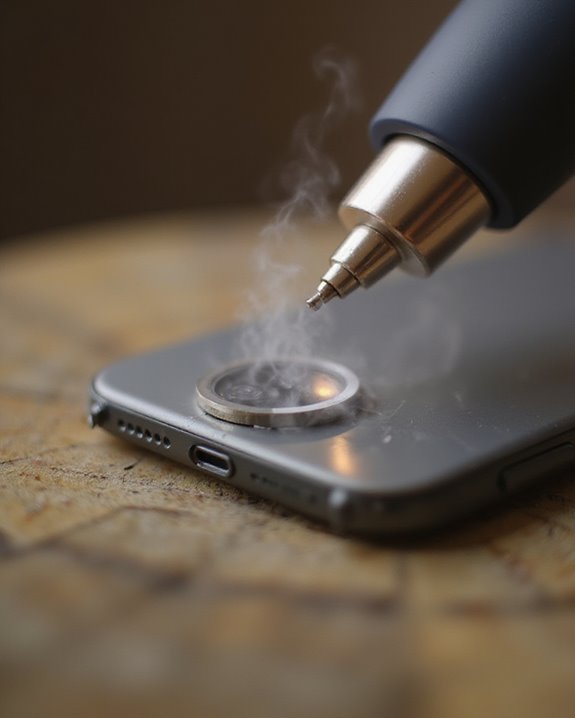
Heat can dramatically simplify the removal of stubborn camera lens protectors by softening the adhesive bonds that secure them in place. When applying heat, users should maintain a distance of 2-3 inches between the heat source and adhesive area, moving continuously to distribute warmth evenly across the surface. Heat guns operating between 100°C and 550°C offer precise control for industrial adhesives, while hair dryers provide gentler heat suitable for delicate components.
Alternative methods include Solar Heating, which utilizes natural sunlight to gradually warm adhesives in outdoor settings, though results vary with intensity and angle. Microwave Application is not recommended for camera equipment, as it risks damaging electronic components. For best results, combine heat application with solvents like rubbing alcohol after warming, and always use heat-resistant surfaces to protect equipment during the process.
Handling Stubborn Protectors
When faced with particularly resistant camera lens protectors, users should employ a systematic approach prioritizing controlled force distribution and proper tool selection. The reheat-and-repeat strategy, applying 5-10 second heat cycles, effectively loosens adhesive while aligning with sustainability practices that minimize waste from damaged protectors. A gentle rocking motion can help break the bond without applying excessive pressure that might crack the glass. For tempered glass protectors, controlled pressure prevents shattering, while flexible film variants require slow, steady peeling to avoid stretching. Market trends indicate growing preference for non-metallic tools like nylon spudgers and guitar picks, which prevent scratching delicate lens surfaces. Environmental optimization plays a vital role, with temperature control (18-25°C) maintaining ideal adhesive flexibility. Should partial detachment occur, users should immediately reapply heat to exposed adhesive sections before continuing removal. Using OEM replacement kits with pre-installed adhesives can also facilitate easier and safer removal, ensuring a higher success rate. Nitrile gloves improve grip while preventing fingerprint contamination, addressing both practical needs and professional standards.
Cleaning the Lens After Removal
Proper debris removal marks the critical first phase in post-protector lens cleaning, requiring a methodical approach to prevent surface damage. Professionals recommend using a lens blower first to dislodge loose particles, followed by gentle brushing with a soft-bristled tool while holding the lens facing downward to prevent debris from falling back onto the glass surface.
For effective polish methods, apply cleaning solution to a microfiber cloth rather than directly to the lens, working in circular motions from the center outward with minimal pressure. Inspection tips include examining the lens under angled light to detect any remaining streaks or residue, paying particular attention to the edges where debris commonly accumulates. This systematic approach guarantees ideal optical clarity without risking damage to delicate lens coatings or introducing new contaminants.
Applying a New Lens Protector
Installing a new camera lens protector requires meticulous preparation of both the lens surface and the protective accessory itself. Technicians recommend removing all debris using an alcohol wipe followed by drying with a microfiber cloth, then using a lint roller to capture residual particles before inspection under bright light.
Proper Alignment Techniques involve using the camera bump as a tactile guide while prioritizing the primary camera position. Users should identify the adhesive side, typically protected by a clear film or blue tab, and handle the protector only by its edges. The Adhesion Process begins by applying gradual pressure from the center outward, employing the thumb squeegee method to eliminate air pockets. After installation, verification includes conducting flash and photo tests while allowing 24 hours for complete adhesive curing.
Troubleshooting Common Removal Issues

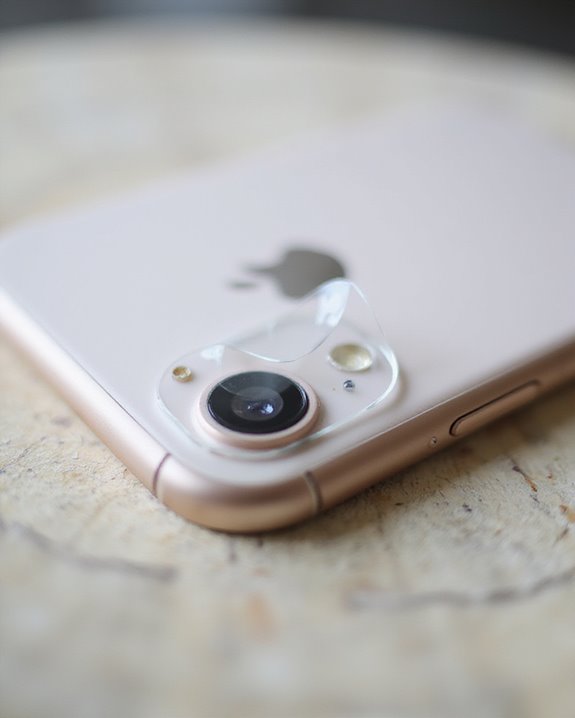
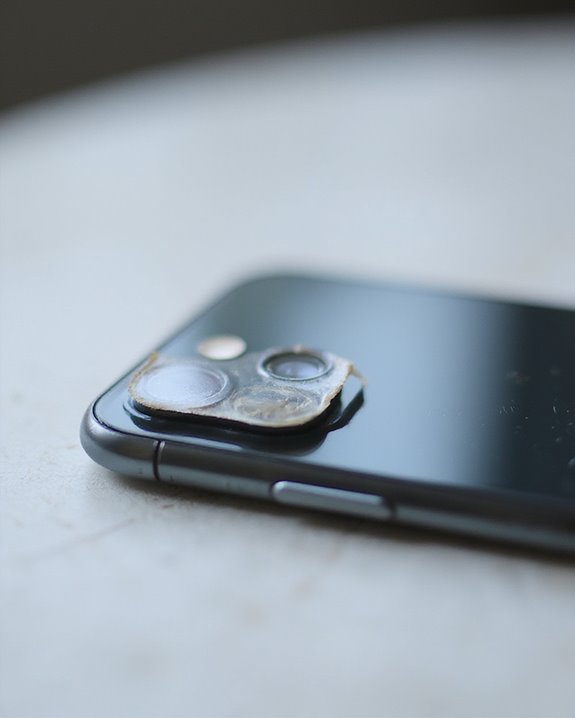
Handling the challenges of removing camera lens protectors requires specific techniques tailored to different situations and device models. When conducting Failure Analysis of stuck protectors, users should first identify the adhesive type being used, as snap-on and stick-on designs necessitate different removal approaches. For broken or shattered protectors, fragments should be directed inward toward the center, minimizing risk to the underlying lens surface.
Recovery Methods vary based on specific complications encountered. For protectors with excessive adhesive buildup, applying 90% isopropyl alcohol for 10-15 seconds before wiping in circular motions typically yields positive results. Users with multi-lens arrays should address each protector individually rather than attempting to remove the entire cluster simultaneously, which can damage the camera’s optical image stabilization system or focusing mechanisms.
Frequently Asked Questions
Can Lens Protector Removal Affect My Camera’s Warranty?
With over 60% of warranty claims denied due to user modifications, lens protector removal can affect warranties. Warranty terms typically exclude damage from improper techniques, though careful removal maintains insurance coverage eligibility for most devices.
How Often Should I Replace My Camera Lens Protector?
Camera lens protectors should be replaced every 3-12 months, depending on usage impact and durability factors. High-quality tempered glass lasts 6-12 months, while plastic versions need replacement every 3-6 months. Regular inspection is recommended.
Are There Differences Between Phone and DSLR Lens Protector Removal?
Phone and DSLR lens protector removal differs greatly. Material differences include adhesive usage in phones versus threaded filters for DSLRs. Technique variations exist too, with phones often requiring heat while DSLRs use simple manual unscrewing methods.
Can I Reuse a Lens Protector After Removal?
Lens guardians may sometimes survive detachment for a second life. However, adhesive integrity often diminishes after removal. With meticulous protector cleaning and proper reuse storage, some protectors might function adequately, though replacement generally yields best results.
Will Removing a Lens Protector Improve Photo Quality?
Removing a lens protector often results in clarity enhancement and distortion reduction, especially if the protector is scratched, low-quality, or has accumulated dirt. Image quality typically improves without the additional glass layer interfering with optics.